“Anything that is measured and watched, improves.”
-Bob Parsons, Founder of GoDaddy
An online presence is practically a given in order for any small business to grow. However, just creating a website and hoping that people will find and engage with your content is not enough to propel your company into success. Many powerful (and free) tools online can help you understand your web traffic, but Google Analytics is the best way to gain true, actionable insight.
For 10 years, homegrown and startup companies have been using Google’s software to improve their business. So can you.
What is Google Analytics?
Google Analytics helps track visitor activity on websites and mobile apps. Once you install them on your page, you can figure out:
✓ How much traffic your site is getting
✓ Where the traffic is coming from (referral keywords, social media, backlinks)
✓ Who is visiting
✓ How much time visitors spend on your site
✓ What pages are visited most often
How you measure and interpret this information can make or break your small ecommerce businesses. Understanding how a user behaves on your site and which information they engage with the longest will result in better audience targeting and marketing. Setting up GA will help you make smarter decisions, reach the right customers and generate more revenue.
Here’s a step-by-step guide for setting up Google Analytics on your company’s website.
1) Create an account
The first step is to create an account for Google Analytics. Start by visiting http://www.google.com/analytics/.

If you already have a Gmail, Chrome, Picasa or Google+ account, you can log in using the same account. If you do not have a login, use the form below to create the account.
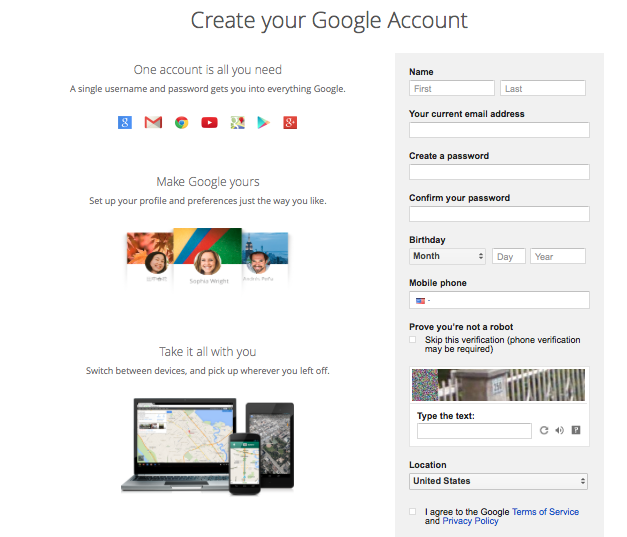
Google will verify the account by sending an SMS or making a voice call to the mobile phone number provided at the time of registration.
2) Establish your property
After setting up the account, you are ready to create your property. By “property,” we mean the website or mobile app you want to track. This is what the form looks like:
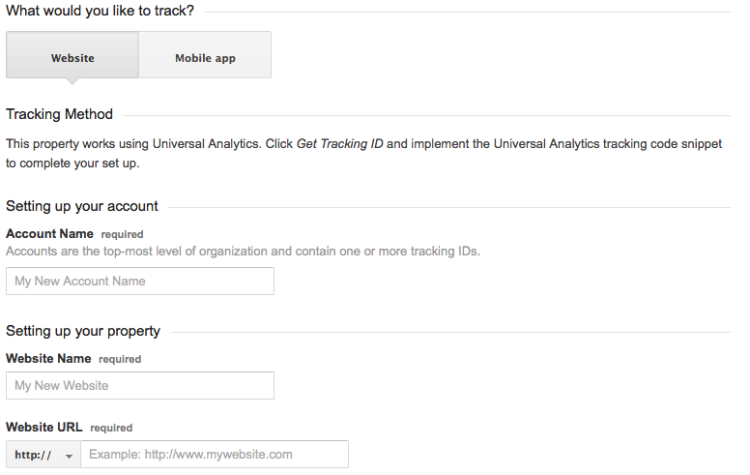
Once you complete the form, click the “Get Tracking ID” button at the bottom of the page. This will be the unique ID that tracks all visitor activity on your site and sends it to Google Analytics.
3) Add Tracking ID to your website
In order to add your Tracking ID, you will need to edit your website’s code. Depending on what platform you host your website on, you will either need to enlist the help of a developer or install a widget to add it to your page. You can access your code by clicking “Tracking Info” followed by “Tracking Code” on the Google Analytics site.

The code will look like this:
Here the “UA-XXXXXXXX” is your unique tracking ID and “myblog.org” is the website address. The code needs to be on every page of your site, so it’s best to add it to a shared component across all pages, like a header or footer.
4) Test your setup
Once the tracking ID has been added, it’s time to test if Google Analytics is actually working for your site. Google usually takes about 24 hours to activate the analytics, so wait for a day before testing your setup.

To check if the setup is working, go to the “Tracking Info”/”Tracking Code” link for the web property and check the status. You should be ready to go as long as the value says Waiting for Data, Receiving Data or Tracking Installed. If the status shows Not Verified or Unknown, you may need to work your way through the instructions again and troubleshoot the issue.
5) Using Google Analytics
Now that you’re all set up, you are ready to use Google Analytics. Google Analytics offers several out-of-the-box reports and dashboards. These reports are categorized into different buckets and can be accessed by clicking on the “Reporting” link at the top of your Google Analytics home page.
a) Dashboards
Dashboards give an overview of how the site is performing by displaying summaries of different reports as widgets on a single page. The dashboard lets you monitor many metrics at once to quickly check the health of your account.
b) Intelligence Events
Google Analytics detects significant statistical variations in the site traffic and automatically generates alerts called intelligence events. These events could help detect a DDoS (denial of service) attack or raise an alert for more traffic from a specific city where your promotional campaign has been really successful.
c) Real-Time
Real-Time reports monitor activity as it happens on the site. The reports are updated continuously and each pageview is reported seconds after it occurs on the site.
d) Audience
Audience reports are designed to provide insight into: who makes up the site audience (demographics, interests, geo), how that audience consumes your content (technology, mobile) and how does loyalty and engagement work (behavior).
e) Acquisition
Acquisition reports provide a window on the users’ Acquisition-Behavior-Conversion (ABC) cycle: how you acquire users, their behavior on your site after acquisition, and their conversion patterns.
f) Behavior
The Behavior reports are designed to help improve the content on your site to better meet the needs and expectations of your users.
g) Conversions
Conversions focus on activities on the site that are important for your business. Whether it’s a signup for your newsletter or a product purchase, track whatever is the most meaningful to your company.
Bonus Points: Enable Ecommerce Tracking
If the number one reason for your online website is to sell products, you will want to set up ecommerce tracking. Google Analytics collects two types of ecommerce data:
Transaction Data
Transaction ID
✓ Affiliate or store name
✓ Total Revenue
✓ Tax
✓ Shipping
Item Data
Transaction ID: same as transaction data
✓ SKU
✓ Product name
✓ Product category/variation
✓ Unit price
✓ Quantity
Collecting these data points has a slightly tricky implementation process, but will ultimately help you measure the bottom line: Total revenue. If you’re exploring the ecommerce option, here’s a quick and helpful guide.